Archives mensuelles : novembre 2019

Cocotb Tips

Some tips for python HDL test module Cocotb.

Read and Write signal

Write:

clk.value = 1
dut.input_signal <= 12
dut.sub_block.memory.array[4] <= 2

Read:

count = dut.counter.value
print(count.binstr)
print(count.integer)
print(count.n_bits)
print(int(dut.counter))

See it under the official documentation.

Yielding a coroutine in a select list fashion

Question asked on stackoverflow.

Using latest python version with virtualenv

If you compile python yourself, don’t forget to add option --enable-shared at configure time (./configure --enable-shared)

$ virtualenv --python=/usr/local/bin/python3.7 ~/envp37
$ source ~/envp37/bin/activate
$ python -m pip install cocotb

Do not forget to re-source your environnement each time you open a new terminal :

$ source ~/envp37/bin/activate

Logging messages and main test class template

This is a template for declaring a class used for test in function @cocotb.test() :

import logging
from cocotb import SimLog
...

class MyDUTNameTest(object):
    """ Test class for MyDUTName"""
    LOGLEVEL = logging.INFO
    # clock frequency is 50Mhz
    PERIOD = (20, "ns")

    def __init__(self):
        if sys.version_info[0] < 3: # because python 2.7 is obsolete
            raise Exception("Must be using Python 3")
        self._dut = dut
        self.log = SimLog("RmiiDebug.{}".format(self.__class__.__name__))
        self.log.setLevel(self.LOGLEVEL)
        self._dut._log.setLevel(self.LOGLEVEL)
        self.clock = Clock(self._dut.clock, self.PERIOD[0], self.PERIOD[1])
        self._clock_thread = cocotb.fork(self.clock.start())

# ....

@cocotb.test()
def my_test(dut):
    mdutn = MyDUTNameTest()
    mdutn.log.info("Launching my test")

Réception du FireAnt

J’en avait déjà parlé dans les colonnes de ce blog. Une nouvelle société produit un FPGA nommé Trion T8. Ce FPGA est la base d’une petite carte de développement proposée par les HongKongais de XIPS Technology sur le site crowdsupply.

Évidemment je n’ai pas résisté à participer à la campagne. Quelques manifestations à HongKong et quelques déboire avec Fedex puis Mondial Relais, voici enfin le kit tant attendu arrivé chez moi.

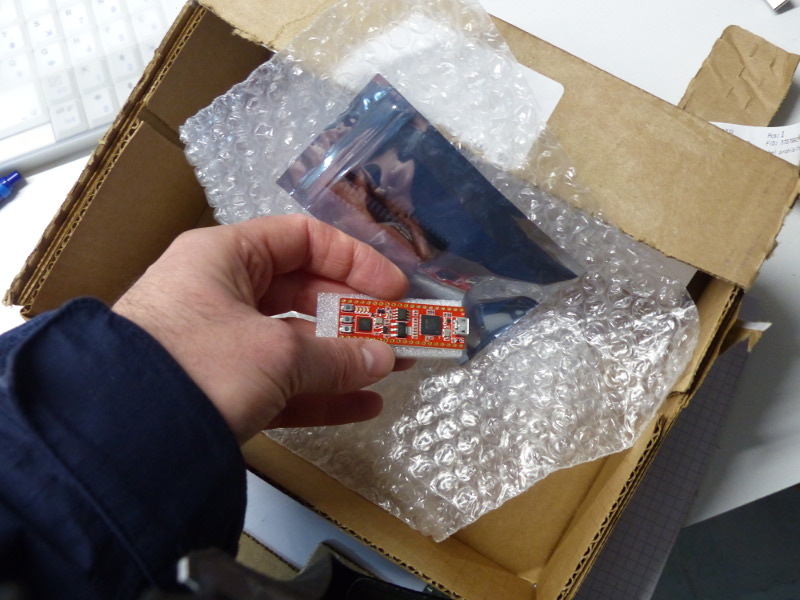
Le carton était un peu disproportionné non ?

Le kit est arrivé dans un énorme carton, mais c’est presque habituel dans ce genre de cas. J’avais pris sans les headers soudés mais ils sont tout de même fournis. J’ai juste eu à les souder moi même.

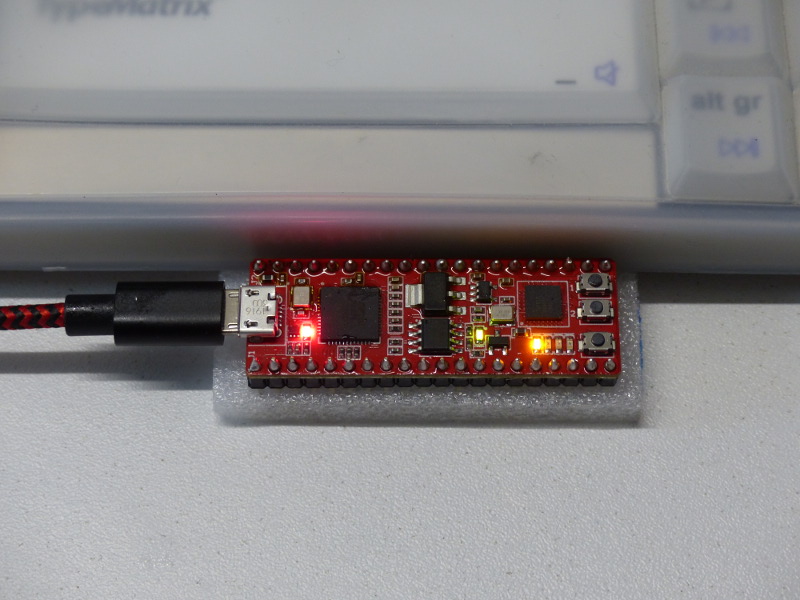
Au branchement une led rouge qui semble être celle de l’alimentation s’allume. Les 4 LED oranges se mettent elles à compter en binaire.

Le FireAnt sous tension de l’interface USB

Dans les messages noyau nous avons la traditionnelle interface ttyUSB0 du FTDI :

$ dmesg
[97997.987953] usb 3-1: USB disconnect, device number 11
[97997.988359] ftdi_sio ttyUSB0: FTDI USB Serial Device converter now disconnected from ttyUSB0
[97997.988397] ftdi_sio 3-1:1.0: device disconnected
[98000.296737] usb 3-1: new high-speed USB device number 12 using xhci_hcd
[98000.445226] usb 3-1: New USB device found, idVendor=0403, idProduct=6014, bcdDevice= 9.00
[98000.445231] usb 3-1: New USB device strings: Mfr=1, Product=2, SerialNumber=0
[98000.445233] usb 3-1: Product: Single RS232-HS
[98000.445235] usb 3-1: Manufacturer: FTDI
[98000.446052] ftdi_sio 3-1:1.0: FTDI USB Serial Device converter detected
[98000.446118] usb 3-1: Detected FT232H
[98000.446278] usb 3-1: FTDI USB Serial Device converter now attached to ttyUSB0
Efinity software

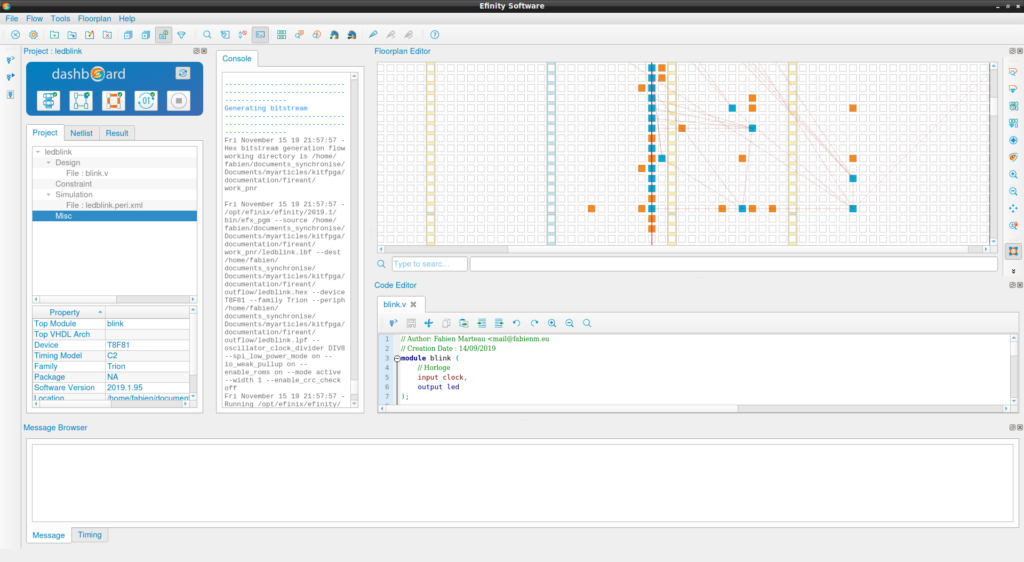
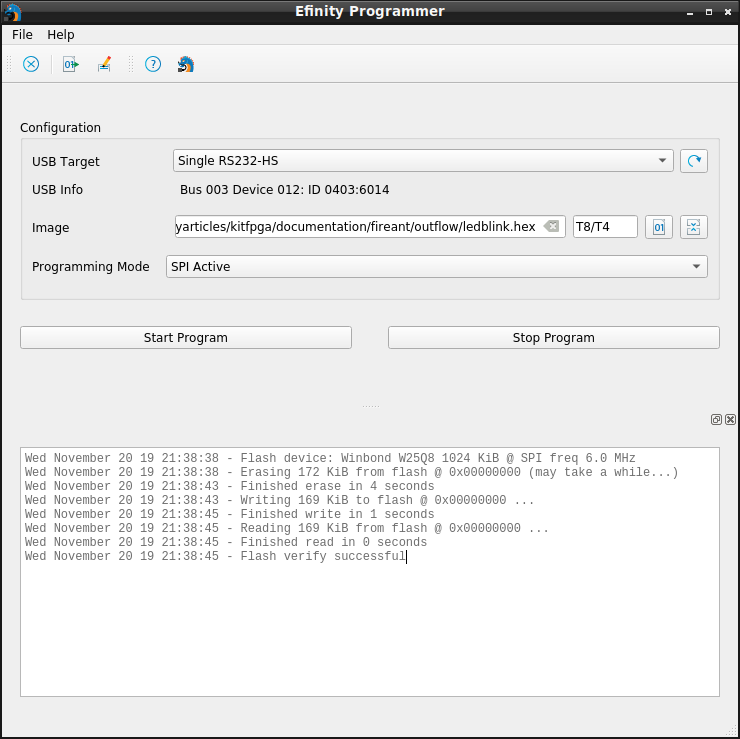
J’avais déjà reçu la license de la part de Efinix et Xips technology, du coup mon blinking led design était près à télécharger. Le bitstream est au format *.hex et se flash super facilement avec le Efinity programmer (tools -> programmer).

Le flashage passe comme une lettre à la poste (… heu mieux que la poste en fait 😉

Par contre ma led ne clignote pas, je pense avoir encore quelques soucis avec les configs d’I/O et de PLL pour l’instant. Je doit encore me former à l’Efinity Interface Designer de Efinix qui est assez déroutant par rapport aux autres IDE.

[edit 28/01/2022]

Il est possible de charger le bitstream avec openFPGALoader sans problème de nos jours :

$ openFPGALoader -b fireant counter/outflow/counter.hex
Jtag frequency : requested 6.00MHz   -> real 6.00MHz  
Parse file DONE
Detail: 
Jedec ID          : ef
memory type       : 40
memory capacity   : 14
00
Detail: 
Jedec ID          : ef
memory type       : 40
memory capacity   : 14
flash chip unknown: use basic protection detection
Erasing: [==================================================] 100.00%
Done
Writing: [==================================================] 100.00%
Done
Wait for CDONE DONE

[ToBeEdited]

Chisel Tips

This page lists some tips for Chisel that I could glean here and there.

Bidirectional signal

Bidirectionnal signals are not possible inside an FPGA or an ASIC. But it can be usefull on the boundary to drive signal like tristate buffer.

To use Bidirectionnal signal use Analog() in conjonction with RawModule or BlackBox :

class TopDesign extends RawModule {
  val tristatebuf = Analog(1.W)
...
}

Connexion is made with bulk connector ‘<>’ :

tristatebuf <> myblackbox.io.tristate

dontTouch : keep register names in verilog

Tip from stackoverflow.

Sometimes, we have to keep register in verilog emitted code. But Chisel obtimize it and it often disapear. To keep it, use dontTouch() :

  val version = dontTouch(RegInit(1.U(8.W)))

Get following in verilog module:

  reg [7:0] version; // @[wbgpio.scala 20:34]
...
    if (reset) begin
      version <= 8'h1;
    end

DontCare output signals

All module output must be defined to avoid this kind of warning :

[error] (run-main-0) firrtl.passes.CheckInitialization$RefNotInitializedException:  : [module ChisNesPad]  Reference io is not fully initialized.
[error]    : io.data.valid <= VOID
[error] firrtl.passes.CheckInitialization$RefNotInitializedException:  : [module ChisNesPad]  Reference io is not fully initialized.
[error]    : io.data.valid <= VOID
[error] Nonzero exit code: 1
[error] (Compile / runMain) Nonzero exit code: 1
[error] Total time: 12 s, completed 10 déc. 2019 13:25:11

But at the begining of a design, we don’t know what to write. To avoid this error we can use DontCare object :

  io.data.valid := DontCare

Keep signal and variables names in Verilog

See the good response from Jack Koening on stackoverflow.

UInt() to Vec()

An UInt() can be converted to a Vec of Bool() with asBools:

val foo = Vec(5, Bool())
val bar = UInt(5.W)

foo := bar.asBools
Initialize Vec() of Reg()

Split an UInt() in a Vec() of «sub» UInt()

Question asked on stackoverflow.

If we have a 16 bits register declared like that.

val counterReg = RegInit(0.U(16.W))

And we want to do indexed dibit assignment on module output like that :

//..
  val io = IO(new Bundle {
     val dibit = Output(UInt(2.W))
  })
//..
var indexReg = RegInit(0.U(4.W))
//..
io.dibit = vectorizedCounter(indexReg) //xxx doesn't work

We could do it like that:

io.dibit := (counterReg >> indexReg)(1, 0)

Initialize Vec() of Reg()

 val initRegOfVec = RegInit(VecInit(Seq.fill(4)(0.U(32.W))))

Concatenate value in one UInt()

Of course we can use Cat(), but it take only 2 parameters. With ‘##’ we can chain more signals:

val a = Reg(UInt(1.W))
val b = Reg(UInt(1.W))
val c = Reg(UInt(1.W))
val y = Reg(UInt(3.W))

y := a ## b ## c

With a Vec() declared like it :

val outputReg = RegInit(0.U((dibitCount*2).W)
val valueVecReg = RegInit(VecInit(Seq.fill(dibitCount)(0.U(2.W))))

ouptutReg := valueVecReg.reduce(_ ## _)

Initialize Bundle

Question asked on stackoverflow. Same question on stackoverflow but with ‘1’ initialization.

If we have a Bundle declared like that :

class RValue (val cSize: Int = 16) extends Bundle {
  val rvalue = Output(UInt(cSize.W))
  val er     = Output(UInt((cSize/2).W))
  val part   = Output(Bool()) /* set if value is partial */
}

And we want to make a register with initialized value we can use the new interface named BundleLiterals:

import chisel3.experimental.BundleLiterals._
...
val valueReg = RegInit((new RValue(cSize)).Lit(
          _.rvalue -> 1.U,
          _.er -> 2.U,
          _.part -> true.B)

Or if we just want to initialize to all 0 values we can do that :

val valueReg = RegInit(0.U.asTypeOf(new RValue(cSize))

Test some chisel code in live

Question asked on stackoverflow.

It can be usefull to be able to test code in console before launching the big compilation. It’s possible in directory where your project build.sbt is :

$ cd myproject/
$ sbt
sbt:myproject> console
scala>

And once in the scala console chisel import can be done :

scala> import chisel3._
import chisel3._
scala> val plop = "b0010101010001".U(13.W)
plop: chisel3.UInt = UInt<13>(1361)

Type Ctrl+D to quit.

For more simplicity it’s also possible to use the Scaties website in live.

For more Chisel Cookbook

See :